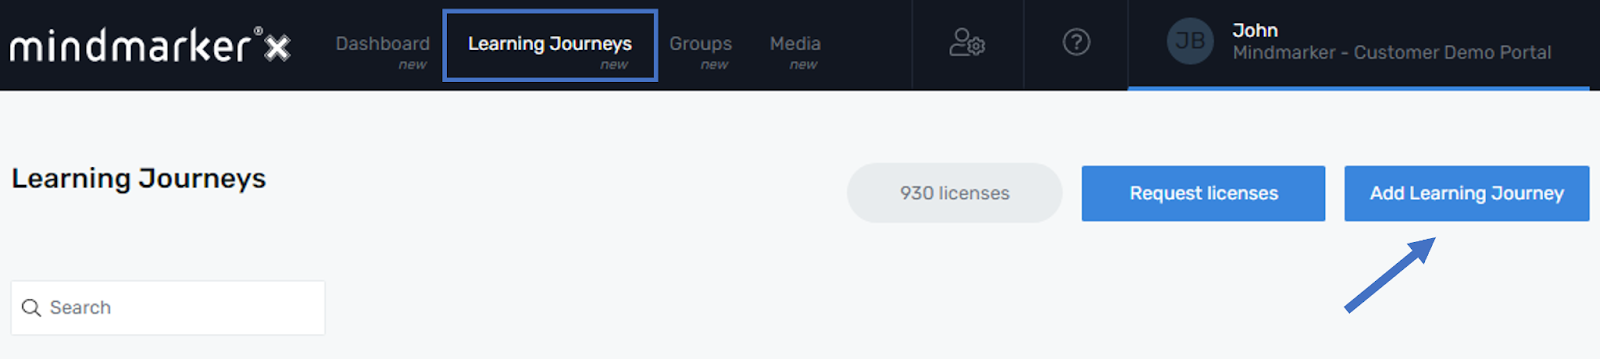
Click Learning Journeys on your menu bar. Then click the Add Learning Journey button located in the top right corner of your screen. You’ll be directed to the New Learning Journey screen.
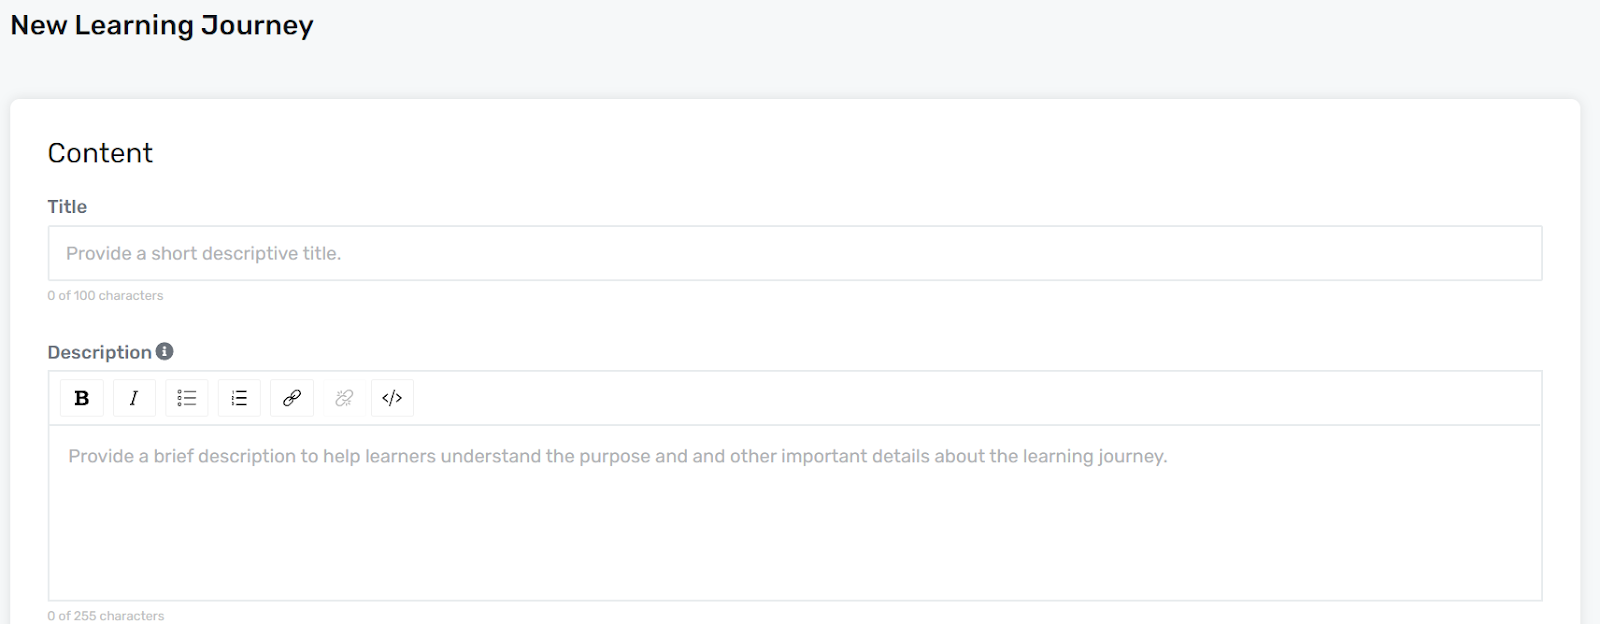
Add a Title
Under the Content section, enter a Title and short Description (required).
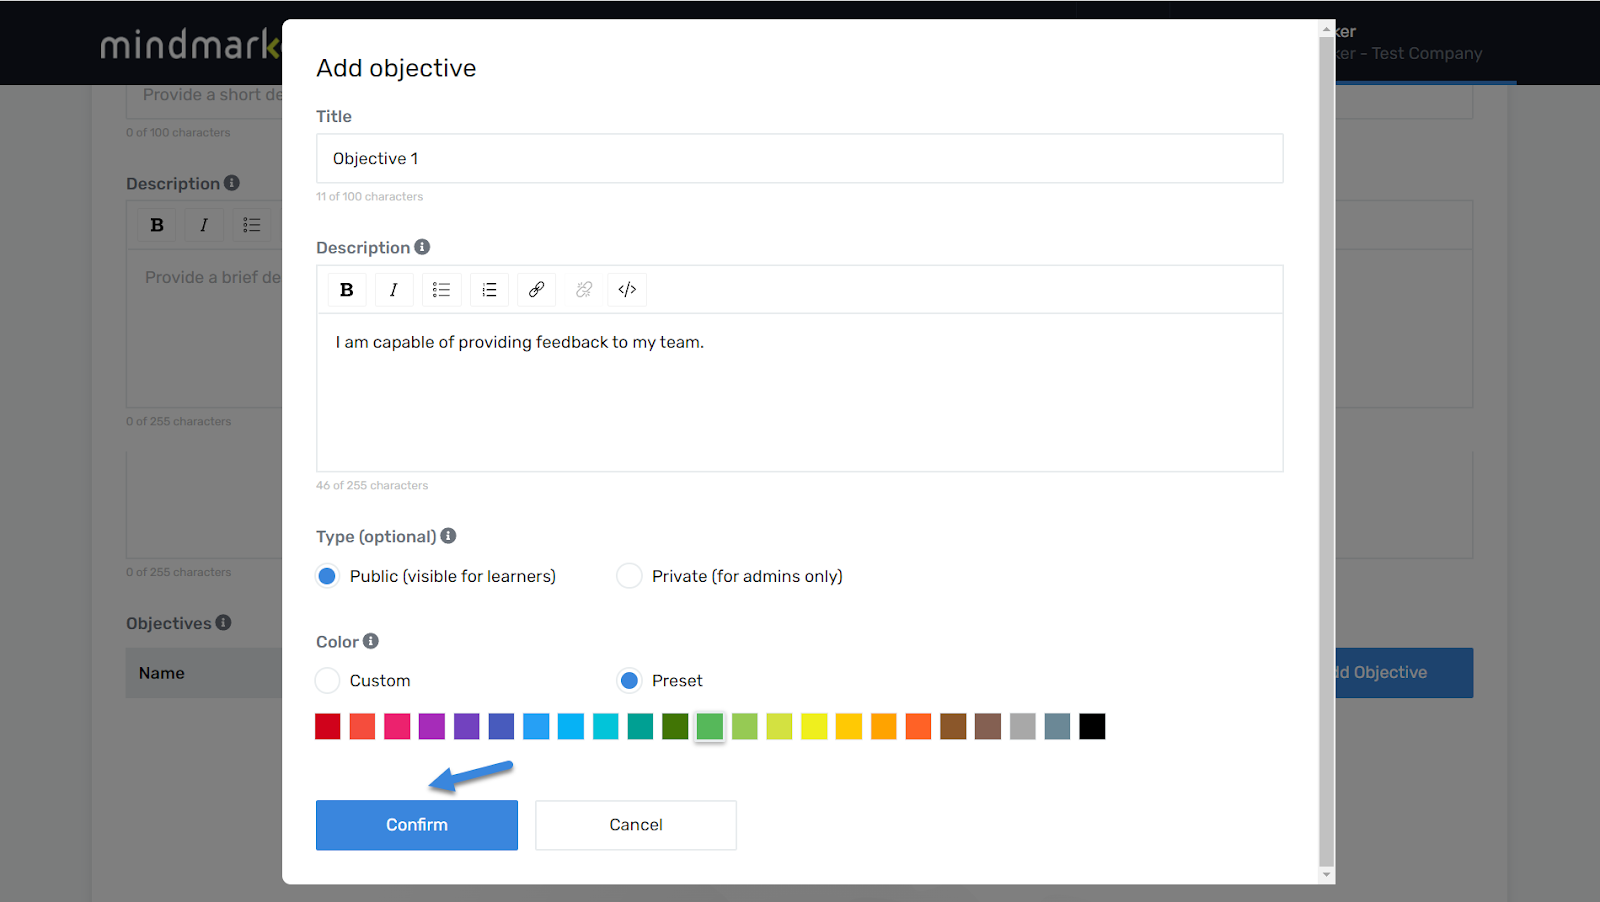
Add Objective(s)
Navigate to the bottom of the section and click Add Objective.
In the Add Objective window, add the following required information:
Title
Description
Type of objective
A Color, which you’ll add by selecting from preset options or defining your own hex code.
Once all required fields are complete, click Confirm to add the objective.
The newly created objective will display. To add additional objectives, click on Add Objective and repeat the process.
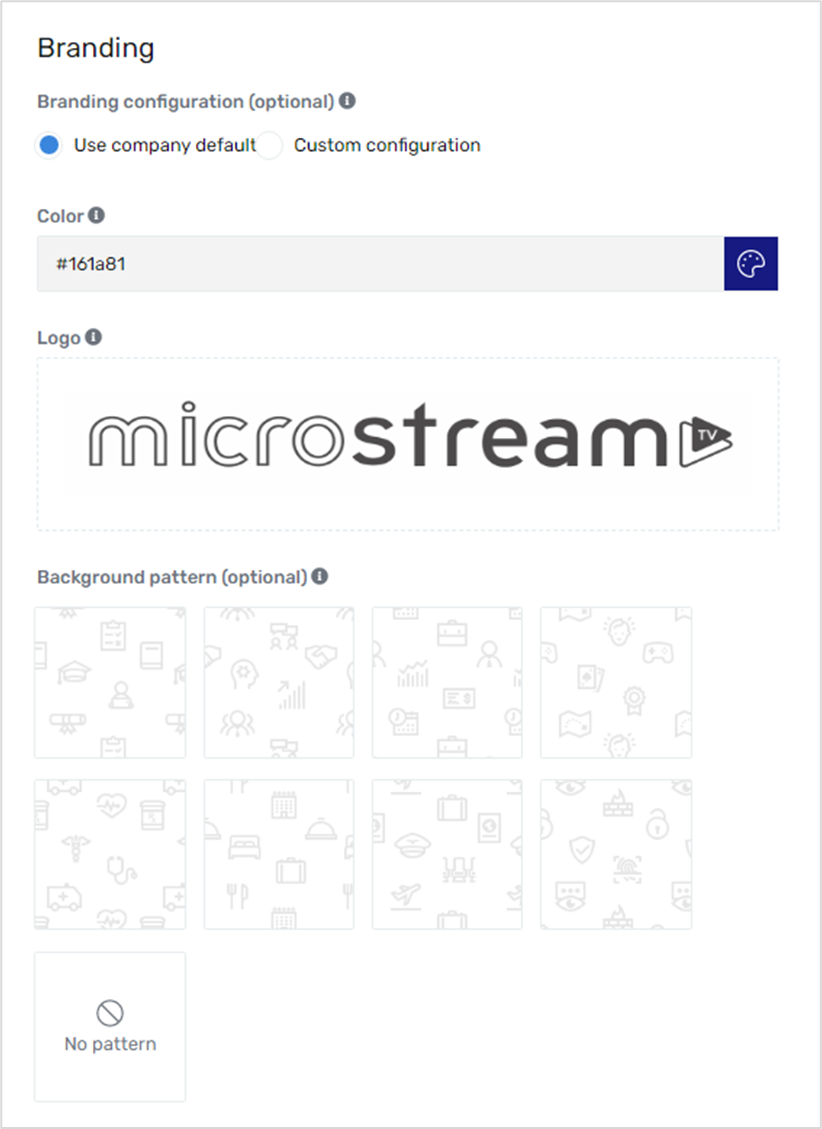
Customize your branding
Under the Branding screen, you can view and update your current settings. Note that all new learning journeys default to the Mindmarker branding.
To update your settings, select the Custom Configuration radio button. This will allow you to:
Update the color palette using HEX, RGB, or HSL
Update or remove your existing logo
Choose a background pattern (optional)
If you want to use this template as your default for all future learning journeys, check the Use as company default box.
Click Save
Once all required fields are complete, click the Save button to apply the changes and create the learning journey.
We use cookies to ensure that we give you the best experience on our website. If you continue to use this site we will assume that you are happy with it.